
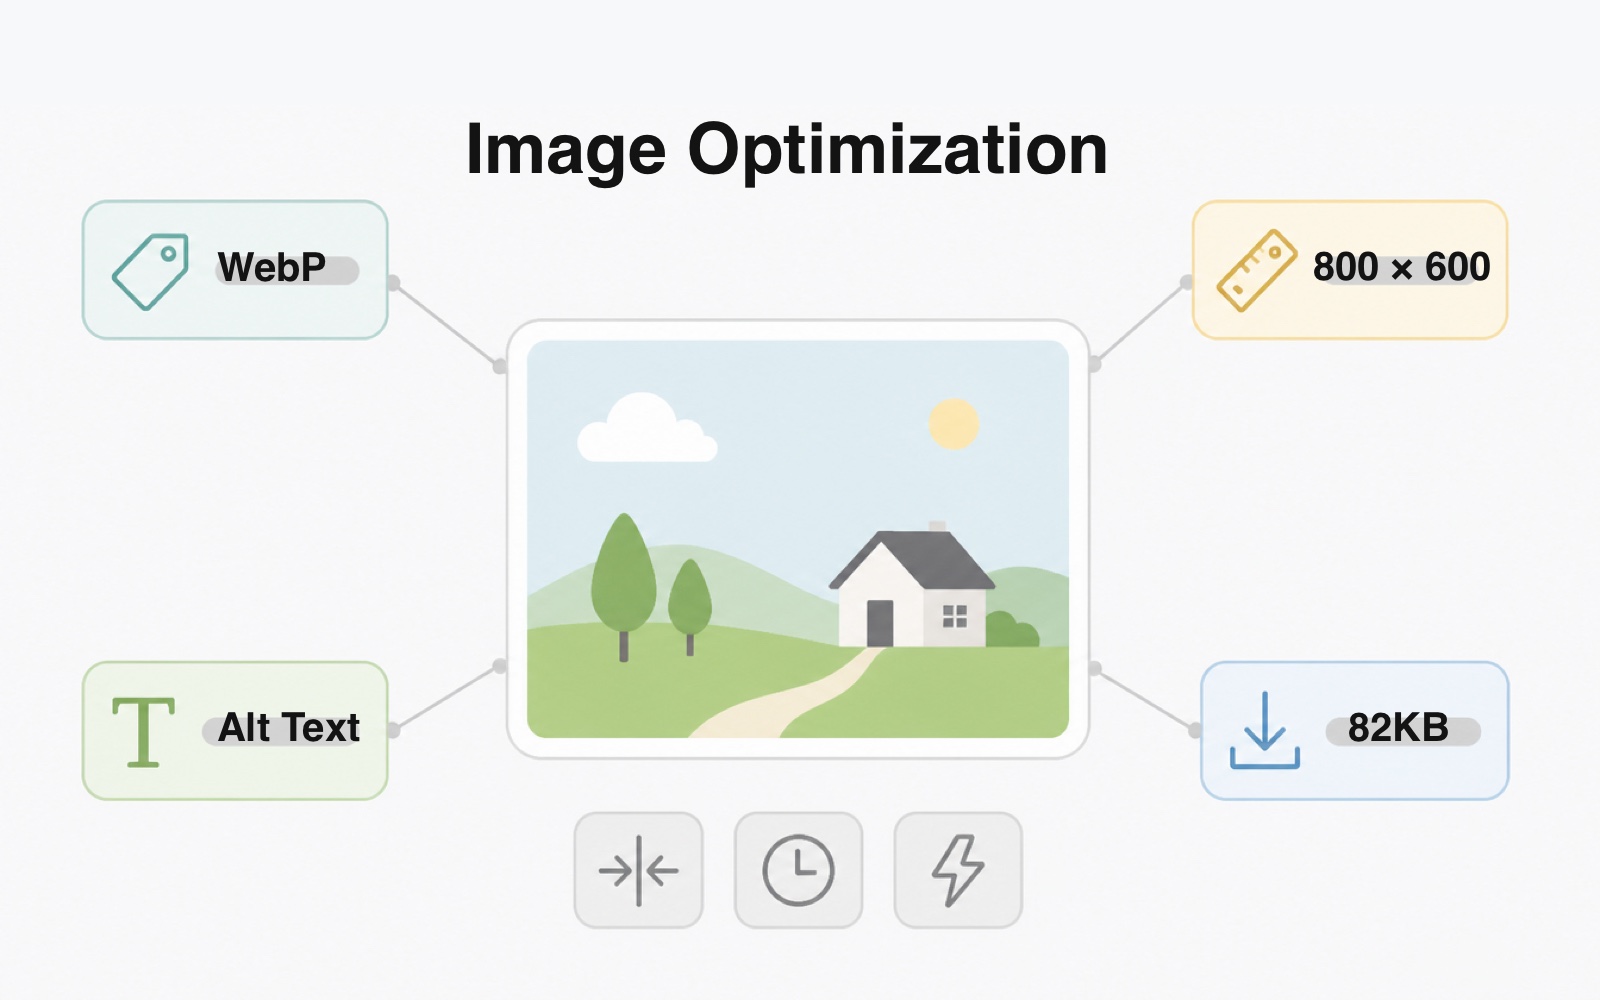
There are many parts to SEO, and the smaller ones get overlooked. But if you want your on-site SEO to be genuinely good, the small steps, such as optimising your images, matter as much as the big ones.
That is especially true when your competitors are not bothering. Get image optimisation right and you pick up speed, rankings, and accessibility at the same time.
Image formats and browser support have moved on considerably since we first wrote this. WebP and AVIF now do most of the work, lazy loading is built into WordPress, and Google measures how fast your largest image loads as a ranking signal. All of that is covered below.
Are images important for SEO?
Yes, for three separate reasons, and it helps to keep them apart.
Engagement. Pages with relevant images hold attention better than walls of text. Google pays attention to how people behave in search results, so a page that keeps readers is a page that performs.
Speed. Images are almost always the heaviest thing on a page, and on most sites the largest image is what Google measures for Largest Contentful Paint, one of the Core Web Vitals it uses as a ranking signal. Image optimisation is page speed optimisation.
Understanding. Search engines read the text around and inside your image markup: the filename, the alt text, the caption. That is your direct control over what they know about the picture.
1. Use relevant, high-quality images
Images that do not match the content confuse readers and send them away. Badly cropped or blurry ones make the business look careless.
Use your own photography wherever you can. Stock images appear on hundreds of other sites, which does nothing for you and occasionally works against you. If you do use stock, stick to reputable sources and make sure you have the rights.
2. Choose the right format
This is where most of the old advice has gone stale. There are now six formats worth knowing, not four.
| Format | Use it for | Transparency | Notes |
|---|---|---|---|
| AVIF | Photos, hero images | Yes | Smallest files. Best quality per byte available today. |
| WebP | Photos, almost anything raster | Yes | Roughly 25-35% smaller than JPG at the same quality. Supported everywhere. |
| SVG | Logos, icons, illustrations | Yes | Vector. Scales to any size with no quality loss, usually tiny. |
| JPG | Photos, as a fallback | No | Universally supported, but larger than WebP for the same result. |
| PNG | Screenshots, flat graphics needing transparency | Yes | Lossless and heavy. Rarely the right choice for a photograph. |
| GIF | Nothing, ideally | Yes, 1-bit only | Limited to 256 colours. Use a short MP4 or WebP for animation instead. |
WebP for photographs, SVG for anything drawn. That single rule covers the vast majority of images on a business website. Reach for AVIF when you want the last few kilobytes, and JPG only as a fallback.
The same photo, three formats
These are the same image, at the same dimensions, encoded at the same quality setting, saved three ways. The JPG cannot do transparency. The other two can. The file sizes are not close.
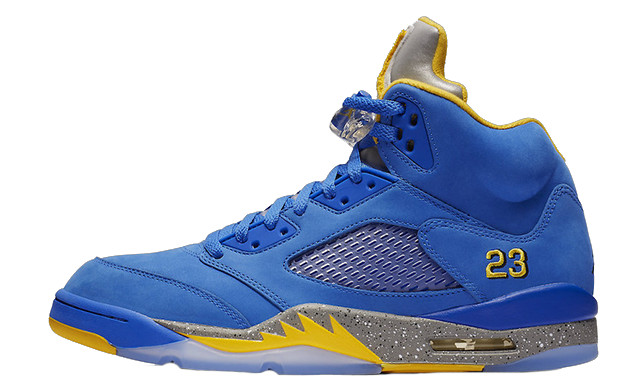
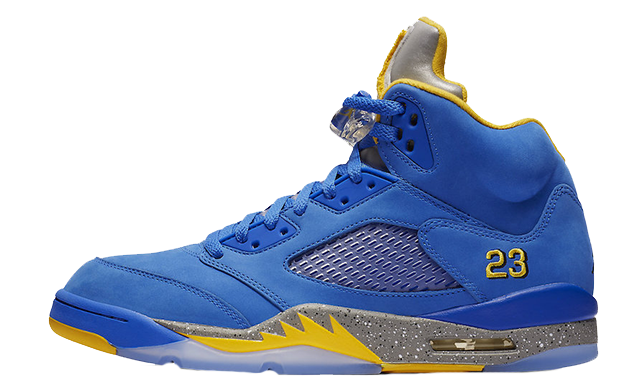
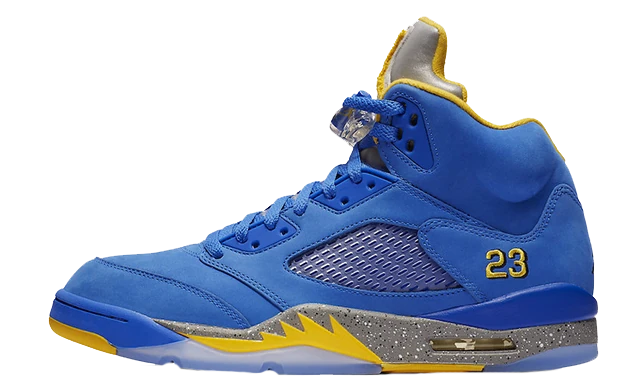
The PNG is four times heavier than the JPG for the same photograph, and the only thing that weight buys you is the transparent background. The WebP gives you that same transparency and still comes in 31% smaller than the JPG.
And quality 90 is more than you need to ship. Drop the WebP to quality 80 and the same picture lands at 29 KB, under half the JPG, with a difference you will not see on a screen.
You will see "WebP is 70% smaller than JPG" repeated all over the web. That number usually comes from comparing a heavily compressed WebP against a high-quality JPG, which is not a comparison of anything. Encode both at the same quality and the honest figure is the 25-35% in the table above, which is still worth taking on every image on your site.
What about GIFs?
Worth saying plainly: an animated GIF is an enormous file for a poor-quality result. A short muted MP4 or an animated WebP delivers better quality at a fraction of the size. GIF survives out of habit, not merit.
3. Compress before you upload
Smaller files load faster, and faster pages rank better and convert better. That has not changed. What has changed is what counts as small.
| Image role | Sensible target |
|---|---|
| Hero or banner | Under 200 KB |
| In-article image | Under 100 KB |
| Product photo | 50-150 KB |
| Thumbnail | Under 30 KB |
| Logo or icon | Under 10 KB, usually SVG |
The old advice of "keep images under 500 KB" is far too generous now. A 500 KB image on a phone connection is a visible delay.
How to get there
- Resize before compressing. Uploading a 4000px photo to display at 800px wastes most of the file. Match the pixel dimensions to the largest size it will actually be shown at.
- Crop to what matters. Removing dead space at the edges shrinks the file and improves the picture.
- Export as WebP rather than converting afterwards, where your editor supports it.
- Run it through a compressor. Squoosh, TinyPNG, or an automated plugin will all take another chunk off without a visible difference.
4. Name the file descriptively
Easy, and still widely skipped. Before uploading, rename the file to describe what is in it.
IMG_4821.jpg tells a search engine nothing. blue-nike-retro-5-sneaker.jpg tells it a great deal.
Describe the image the way someone would search for it. Use hyphens between words, keep it lowercase, and do not stuff in keywords that have nothing to do with the picture.

illustration-house-by-river-in-the-mountains.jpg. A search engine can tell what this is before it has looked at a single pixel.5. Write alt text for people, not for keywords
This is the one piece of advice from the original version of this article that we would now put differently.
Alt text exists so that someone using a screen reader knows what the image shows. Search engines read it because it is a genuine description, not because it is a place to put keywords. Write what you would say to someone who cannot see the image. If a keyword belongs in that sentence naturally, good. If it does not, leave it out.
Good: alt="Blue Nike Retro 5 sneaker on a white background"
Bad: alt="sneakers shoes buy shoes online cheap trainers nike"
Purely decorative images, such as a background flourish, should have an empty alt="" so screen readers skip them rather than announcing something meaningless.
The title attribute
The previous version of this article suggested adding a title attribute. We would no longer recommend it. It does nothing on touchscreens, screen readers treat it inconsistently, and it adds no SEO value. Put the effort into the alt text and the caption instead.
6. Always set width and height
This one did not appear in the original article and is now among the most valuable things on the list.
When an image has no dimensions in the markup, the browser does not know how much room to reserve. Text renders, then the image arrives and shoves everything down the page. That is Cumulative Layout Shift, another Core Web Vital, and it is intensely annoying to read.
<img src="blue-nike-retro-5-sneaker.webp"
     alt="Blue Nike Retro 5 sneaker on a white background"
     width="800" height="600">
Two attributes, and the browser reserves the right space before the file arrives. WordPress adds these automatically for images inserted through the media library.
7. Lazy load, but not the first image
Lazy loading defers images below the fold until the reader scrolls near them, so the page shows its first screen sooner. WordPress has done this automatically since version 5.5.
Never lazy load your hero image. It is usually the Largest Contentful Paint element, and lazy loading it delays the exact thing Google is measuring. Mark it the other way instead:
<!-- hero image: load it first -->
<img src="hero.webp" alt="..." width="1600" height="900"
     loading="eager" fetchpriority="high">

<!-- everything further down the page -->
<img src="detail.webp" alt="..." width="800" height="600"
     loading="lazy">
fetchpriority="high" tells the browser to fetch that image ahead of other resources. On image-led pages it is one of the largest single improvements available to you.
8. Serve the right size to each device
A phone does not need the same file as a desktop monitor. Responsive images let the browser pick.
<img src="sneaker-800.webp"
     srcset="sneaker-400.webp 400w,
             sneaker-800.webp 800w,
             sneaker-1600.webp 1600w"
     sizes="(max-width: 600px) 400px, 800px"
     alt="Blue Nike Retro 5 sneaker on a white background"
     width="800" height="600">
WordPress generates these automatically for uploaded images, which is one of the better reasons to insert images through the media library rather than hardcoding them.
9. Use the HTML5 figure and figcaption tags
Still good advice. Wrapping an image and its caption in a <figure> ties them together as one unit, which helps both search engines and screen readers understand that the caption belongs to that image.
<figure>
  <img src="illustration-house-by-river-in-the-mountains.webp"
       alt="Illustration of a house beside a river in the mountains"
       width="1200" height="800" loading="lazy">
  <figcaption>A house beside a river in the mountains.</figcaption>
</figure>
Captions are also read far more often than body text, so they are worth writing properly rather than repeating the alt text.
10. Use a CDN
A content delivery network stores copies of your images on servers around the world and serves each visitor from the nearest one. It takes the load off your own server and cuts the distance the file has to travel.
The old answer to "do I need one?" was that small local businesses could skip it. That is no longer true, because it is now free and automatic. Cloudflare's free tier puts a CDN in front of any site with a DNS change, and most decent hosts include one. There is no longer a good reason not to.
11. Include images in your sitemap
A sitemap helps Google find and index your pages, and image entries help your pictures appear in Google Images. WordPress SEO plugins generate this automatically, so for most sites it is a matter of confirming it is switched on rather than building anything.
Check what Google has actually indexed in Search Console, which is what Google Webmaster Tools became.
A quick checklist
| Before uploading | In the markup |
|---|---|
| Resize to display dimensions | Descriptive alt text |
| Export as WebP | width and height set |
| Compress | loading="lazy" below the fold |
| Rename descriptively | fetchpriority="high" on the hero |
| Check it is under target size | srcset for multiple sizes |
Bonus tip: actually do it
When you are running a business, looking after customers, and trying to stay sane, it is hard to give SEO the time. Image optimisation is one of the easiest parts to get right though. It is not clever, it is just a handful of habits applied consistently.
Give your images the attention they deserve and you get better rankings, faster pages, and a site that works for people using screen readers. Three wins for one job.
If you would like us to look at what your images are costing you in load time, get in touch and we will run the numbers.